


What Is a Dutch Joint and How Do You Roll One?
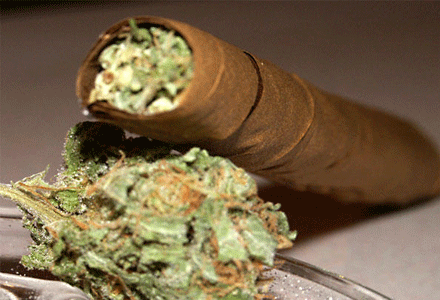
Also known in the United States as a “Dutch Master” (named after the whole tobacco leaves used in its creation), the Dutch joint is a favorite way to enjoy a strong smoke on the East Coast. Essentially, a Dutch joint is a cigar that ensures a smooth burn of the material inside. Unlike regular joints (simple rolling papers), Dutch joints don’t require you to grind your buds beforehand for an even burn. With a fresh tobacco leaf, you can quickly make a juicy cannabis cigar that’s a pleasure to smoke.
Unlike other types of joints, such as hand-rolled cigarettes or cigars made from dried tobacco leaves, a true “Dutch” requires the freshest possible tobacco leaf, where you can clearly see the plant’s veins.
Ingredients
- Fresh tobacco leaf (such as Dutch Masters or a similar cigar brand)
- Cannabis buds
- Grinder (optional)
- Knife, razor, or something similar
Step 1: Moisten the Leaf
Lightly lick the tobacco leaf to moisten it well. Your saliva, combined with the natural juices of the fresh leaf, will help keep it in the right shape. Let the cigar set while you prepare the buds.
Step 2: Break Up the Buds
As mentioned earlier, the main advantage of a Dutch joint is that you can simply break up the buds by hand, without scissors or a grinder. Make sure there are no stems sticking out, as they could tear the cigar from the inside.
Step 3: Remove the Outer Layer of the Leaf
Return to the cigar. If it has dried out, moisten it again with your saliva. Then, very carefully, using your fingernails or a small knife/razor, peel off the outer layer of the tobacco leaf. It’s best to make a small cut to help you peel it off like a skin. Take your time to avoid tearing the joint.
Step 4: Split the Cigar
Carefully cut the cigar lengthwise on one side. Try to make the cut as straight as possible, as this will make it easier to seal the leaf later. If you’re using store-bought cigars, empty out all the tobacco from inside.
Step 5: Fill with Buds
Now fill the cigar with your prepared cannabis, again making sure there are no stems sticking out. Gently press the cut edges together to close the joint, then roll it on a flat surface to firm it up. Tuck one end of the leaf inward.
Step 6: Wrap the Joint in the Outer Leaf Layer
Moisten the outer layer of the leaf on both sides and lay it flat. Place the joint on one side and slowly and carefully start wrapping it in the leaf. Once you’re done, let the cigar set for a couple of minutes.
Step 7: Light Up!
Your natural tobacco Dutch joint is now ready to smoke. If you didn’t get it right the first time, don’t worry—this process can be slow and delicate, and practice makes perfect.