


How to Remove a Bullet: What You Need to Know
Thinking about trying to remove a bullet from a wound yourself? Before you do, let’s go over some sobering facts.
The human body has about 206 bones, 6 liters of blood, and roughly 100,000 kilometers (over 62,000 miles!) of blood vessels. When a piece of metal traveling at 300–400 m/s (about 1,000–1,300 ft/s) enters the body, it tears through tissue and blood vessels, shatters bones, and disrupts this delicate system. The shockwave from the bullet causes massive bruising and internal bleeding.
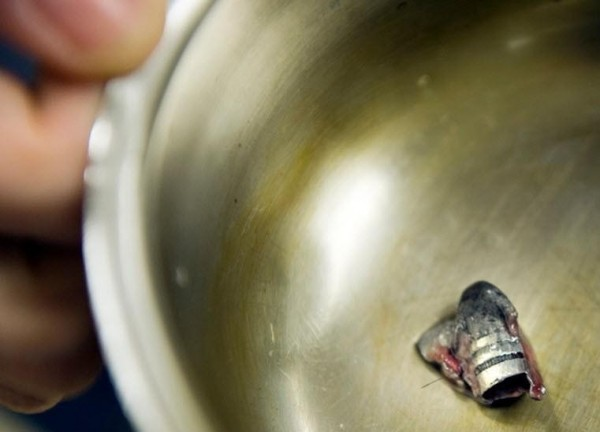
Some bullets aren’t simple—they may have cross-shaped cuts on the tip. Upon impact, these bullets open up inside the body into a gruesome lead “flower” that’s extremely difficult to remove. Bullets rarely travel in a straight line after entering the body; they can veer off course, shedding fragments of their metal jacket along the way. It’s unlikely the bullet will stop directly opposite the entry wound.
The wound channel is not a neat, round hole with a bullet stuck at the end. It’s a ragged cavity filled with bloody tissue, bone fragments, and bits of nerves and blood vessels, with blood and other fluids constantly oozing out. It’s not a sight for the faint of heart. Finding a tiny piece of metal in this mess is no easy task.
So, when people claim that removing a bullet is a piece of cake, I agree—if you have a bucket full of bullets you’ve personally removed and a wall covered in thank-you certificates from people you’ve saved. Otherwise, without practice and in unsanitary conditions, it’s nearly impossible.
If the bullet didn’t exit and is still inside the body, it means it was either losing speed, hit an obstacle (like a bulletproof vest) and lost energy and deformed, or struck a bone and got stuck, likely flattening out and shattering the bone in the process. This already bad situation is made worse by the near certainty of infection—nobody sterilizes bullets or gun barrels before a fight.
Your best bet is to bandage the wound and get the injured person to a hospital. If the wound isn’t in the abdomen, give them plenty to drink to help compensate for blood loss.
But let’s say a hospital is out of the question, and you’re the only one who can help because there are no doctors left—maybe the world as we know it has ended. In that case…
When (and When Not) to Attempt Bullet Removal
Think carefully. If the bullet is in the head, neck, abdomen, or chest, trying to remove it will almost certainly kill the patient. If it’s in an arm or leg and stuck in a large muscle group, you might take the risk. People can live with bullets inside them—the body can encapsulate the bullet, and the immune system can suppress infection.
What You’ll Need
- A strong assistant to hold the patient still while you work.
- Tweezers with special teeth, or at least long-nosed pliers. Boil these tools beforehand and place them on a sterile piece of gauze or several layers of unfolded bandage.
- Plenty of boiled water.
- Lots of sterile bandages.
- A bulb syringe (the rubber “pear” type).
- All the determination you can muster.
Tweezers, bandages, and antiseptics should always be in your personal first aid kit.
Step-by-Step Bullet Removal Procedure
- Wash your hands. If available, put on sterile gloves and a surgical mask.
- If the wounded limb is clothed, cut the clothing away.
- Thoroughly rinse the wound with water. If you have antiseptic, wipe the skin around the wound with it. If not, use alcohol or vodka.
- During the search and removal, the patient will likely thrash, scream, and try to stop you. Your assistant must firmly secure the injured limb on a flat, well-lit surface (table, chair, door taken off its hinges, or even the floor).
- Start draining blood from the wound using the bulb syringe and tweezers—use the tweezers to pull the wound edges apart and the syringe to suction out blood. Blood will make it hard to find the bullet. Once the wound is relatively dry, insert a finger into the wound channel and try to feel the bullet, since you won’t have an X-ray. Keep draining blood as it accumulates. If blood is pouring out too quickly, a major vessel may be damaged. Decide if it’s worth continuing.
- If you find the bullet, great! Now comes the hard part: getting it out. Spread the wound edges with your fingers. Use the tweezers to follow the wound channel to the bullet. If you can’t get it with tweezers, use pliers. Brutal, right?
- Be careful not to mistake a bone fragment for the bullet. If you manage to remove the bullet, drop it in a can. There may be fabric fibers or other debris in the wound—try to remove these with tweezers as well.
- Rinse the wound with water and apply a sterile dressing. From here on, it’s up to the patient’s body. Your job is to change the dressing regularly and watch for signs of infection.
A Few Words About Anesthesia
If you have painkillers (novocaine, lidocaine, ultracaine, promidol, or even just no-shpa), it’s best to give an injection or 2–3 tablets right away. But first, make sure the patient isn’t allergic to the medication—otherwise, your good intentions could kill them. If you’re not sure, don’t risk it. If nothing else, give the patient about 150 ml (5 oz) of vodka if available.
Whether to give alcohol before surgery is debatable. On one hand, it dulls pain a bit. On the other, it thins the blood and reduces clotting.
The best option for pain relief in this kind of “field surgery” is a can of special anesthetic spray. Spray the wound through a tube, wait for the area to go numb, and proceed.
Hopefully, you’ll never need to use this information.