


Step-by-Step Guide to Growing MJ in Soil for Beginners
This article provides a step-by-step overview of the basics of growing MJ in soil. There are many different methods and techniques, which you can read about on specialized forums. This guide is based on personal experience and has been used successfully and efficiently year after year.
Step 1: Germinating the Seeds
This is an exciting stage for beginners, but experienced growers find it routine and easy. There are many ways to germinate seeds; here, we’ll use the cotton pad method. You’ll need:
- 1 MJ seed
- 2 cotton pads
- Warm water and any small container (like a jar lid, saucer, or food container)
Some people prefer to soak seeds in water for 24 hours before germinating, but I skip this and use the cotton pads directly. Place the seed between two cotton pads, moisten them with a thin stream or drops of warm tap water, and place them in the container. The pads should be damp but not soaking wet—squeeze out excess water so that no water drips out when pressed. Too much moisture can cause the seed to rot. Place the container in a dark place at 68–75°F (20–24°C) and check once a day to ensure the pads stay moist. The root should appear within 1–3 days. If not, the seed may be old or have a thick shell. If the seed is swollen but the root hasn’t emerged, you can gently crack it open with your fingers until you hear a click. Inside, you’ll see white cotyledons. Leave it for another day or two and check again until the root appears. Once the root is visible, move on to step two: planting in soil.
Additional tips: Before germinating, you can store seeds in an airtight container in the fridge (not the freezer) for a few days. I always keep my seeds in the fridge, which keeps them viable longer and helps them sprout faster. You can also add a seed revitalizer like HB-101 to the water to help activate the seeds.
Step 2: Planting in Soil
This is the simplest step. Take two 0.5-liter (about 16 oz) plastic cups. Cut the bottom off one and slice it vertically from bottom to top. Place it inside the whole cup and fill with soil. Moisten the soil with about 100 ml of water—enough to dampen but not saturate it. Plant the seed root-down about 1 cm deep. I leave the very top of the seed visible so I can see if it’s opening. If nothing happens, you can dig it up and check, but don’t disturb the soil every half hour—wait three days. Good seeds usually sprout in 1–2 days. While waiting, make sure the soil doesn’t dry out and mist it with a spray bottle if needed. Keep the cup in a dark place at room temperature.
Step 3: Moving to the Grow Box
Once the stem appears above the soil, move the cup into the grow box under lights. Set the light schedule to 12/12 (12 hours on, 12 hours off) and keep it that way until the seedling sheds its shell. Once that happens, switch to 18/6 or 20/4. The 20/4 schedule helps keep the plant shorter if your grow box has limited height.
Step 4: Transplanting to a Pot
This step is also straightforward. Choose a pot size based on your desired yield and the space in your grow box. For autoflowering strains, a 5-liter (about 1.3 gallons) pot is optimal; I usually use 8-liter pots. For photoperiod strains, 10–12 liters (2.5–3 gallons) is best. Moisten the soil, make a hole, and gently remove the inner cup with the plant and soil. Place it in the hole and carefully remove the cup. Cover with soil, and the transplant is done.
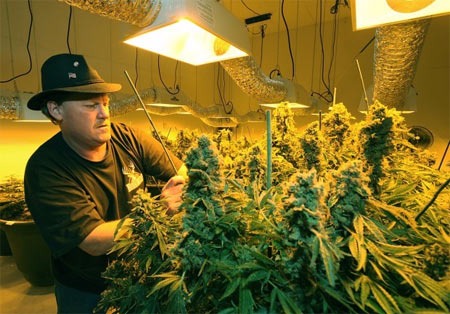
Step 5: Vegetative Stage
During this stage, you can perform techniques like topping, FIM, SCROG, and LST. I’ll cover these in detail in another article. The vegetative period under 18/6 or 20/4 lighting lasts 2–6 weeks, depending on your goals, grow box size, and pot volume.
Step 6: Flowering
After the vegetative stage, switch the light schedule to 12/12. For autoflowering strains, you can keep 18/6 or 20/4 until the end; using 12/12 will significantly reduce your yield. After changing the schedule, the pre-flowering stage begins, lasting 10 days to 3 weeks depending on the strain. Flowering officially starts when you see white hairs (stigmas) on the tops of the plants.
Flowering usually lasts about two months. The breeder’s stated timelines may differ from reality, as they assume ideal conditions (light, ventilation, temperature, humidity, nutrients). It’s usually best to let the plant flower 10–14 days longer than the breeder suggests.
Step 7: Harvest
This is the most exciting and anticipated moment for any grower. You can tell the plant is ready by using a microscope, by its appearance, or by sampling a small bud. The final product will be much stronger after curing than a fresh sample. Cut the plant at the base with scissors and trim off all the leaves (manicuring). You can use the leaves later to make oil for cooking—more on that in another article. Once only the buds remain on the branches, hang the plant upside down in a dark, well-ventilated room with low humidity. Drying takes 3–7 days. Check the buds to ensure they dry evenly, don’t mold, and don’t become too brittle. They should be dense but not crumbly—you’ll get the feel for it with experience. Don’t rush or cure wet buds, as this can ruin your harvest. It’s better to overdry than underdry. Once the buds are ready, cut them off the stems, place them in glass jars, and store them in the fridge for several weeks, checking daily for condensation. If you see moisture, dry them a bit more and keep monitoring. After a few weeks of curing, move your stash to the freezer and enjoy high-quality buds in a cozy setting. ✌️